Saturday 17 January 2009

Chinese Pastry-by Video Jug

How To Make Chinese Pastry

Get all of your ingredients together! This way, you won't have to be running back and forth trying to get everything together. The process runs much smoother this way! Preheat your oven to 350 degrees and spray your cookie sheet with non stick spray. This prevents your delicious little pastries from getting stuck and losing all of their delicious fillings!

You Will Need

Weights & Measures:
Serves:
1
Preparation Time:
15 minutes
Cooking Time:
30 minutes
Oven Temperature:
175° c - 350° f
Step 1: Let's Get The Dough Together
Take all of your ingredients and put them either into a bowl, or a food processor. A food processor does make this recipe a lot easier, but it is definitely not required. You can do this just as easily with a bowl, a whisk or fork, and your two hands! This is easier when your butter is gently softened. You don't want this to be liquid, but you want it very soft. So mix your ingredients your way!
Step 2: You Know It's Ready When...
You know your dough is ready in the food processor when it has formed a pretty little ball and you are able to take it out and roll out. You know you are ready with your bowl and fork (and/or whisk, and/or hands), when you have achieved dough like consistency. This means your dough is firm, smooth and feels like biscuit dough. You just basically want everything mixed very well.
Step 3: Roll It Out
Once you have your dough combined, gently dust flour onto a flat surface so you can roll out your dough. You only want enough to keep your dough from sticking to the surface. Also, rub a tiny bit of flour on your rolling pin so the dough doesn't stick to that either. Roll your dough to an 1/8th of an inch thickness. Take your knife and cut the dough into roughly 2 inch by 2 inch squares.
Step 4: Fill Them Up
This is where you fill your pastries with delicious filling, whether it be something sweet or savory. You could do chopped fruit with a sprinkle of sugar - there are thousands of options. Whatever you may put into your pastries, only put a small amount on 1/2 of the pastry, and leave 1/4 of an inch to seal. Then drape the remaining edge over and press the edges down with a fork.
Step 5: Cook
Once you have filled up your pastries, gently lay these on your cookie sheet about 1/2 of an inch apart and place in the oven, which was preheated to 350 degrees. Let these bake for 15 minutes and then take your spatula and GENTLY flip them over. This will allow both sides to brown gently. You can also gently brush these with some scrambled egg, or melted butter.
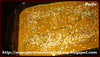
Step 6: Serve and Enjoy
These pastries are delicious cold, warm, or at room temperature, and are able to be filled with a variety of fillings. Enjoy this recipe! You will use it many times!

Puff Pastry by Caite19 (on Video Jug)

How To Make Puff Pastry


<><>

You Will Need

Weights & Measures:
Serves:
4
Preparation Time:
2 hours

Step 1: Slice The Butter
Slice the butter sticks up into about 1 tsp chunks or smaller. The smaller the chunks the easier your dough will be to mold. Letting the butter sit on a counter for about 15 minutes before using will help to distribute more evenly.
Step 2: Sift The Flour
Sift your flour evenly over the butter cubes.
Step 3: Roll The Flour
Roll the flour lightly into the butter. Do not press the flour to hard into the butter. Pastry will take several more steps before being recognizable as a dough. Should be about 1/2 inch to 3/4 inch thick.
Step 4: Fold The Dough
This will take several passes. Add just a little bit (maybe a tablespoon). Using the pastry knife ( I use a disposable cutting sheet when doing this), turn the dough on its self. Lightly roll the mixture 1 or 2 passes. Repeat until the mixture becomes a recognisable dough and the lumps are gone. Pinch any small lump between your fingers to disperse.
Step 5: Let It Rest
Let your dough rest for about an hour. This allows the dough to set and helps in making it flaky.
Step 6: One Final Turn
After allowing your dough to rest, fold into thirds, roll lightly, then fold in half. And you are done. You can now either use the dough or you can freeze and use it in the near future.

Gravy out of oven roasted beef-by Video Jug


Sauces & Condiments:How To Make The Perfect Gravy

Roast Beef-by Video Jug


Beef:How To Make Roast Beef

Shepherd's Pie-by Video Jug


British Food:How To Make Shepherd's Pie

Classic Quiche Lorraine by Video Jug


British Food:How To Make A Classic Quiche Lorraine

Meat And Potato Pie by Videojug Team


British Food:How To Make Meat And Potato Pie

Fisherman's Pie-by Video Jug


British Food:How To Make Fisherman's Pie

Short Crust Pastry by Limalady (on Video Jug)

How To Make Short Crust Pastry


Short crust pastry is a type of pastry that does not rise or puff up during baking. It is used in a variety of recipes, most notably as the crust for pies and tarts. As a rule, shortcrust pastry contains half as much fat as the amount of flour in the recipe. Often the type of fat is divided equally between butter and shortening. The result is a light, flaky and delicious crust.


<><>


You Will Need
  • 110 g Plain Flour , NB The amount sin this recipe will make enough pastry to make a good-sized quiche or tart
  • 25 g Lard
  • 25 g Butter

Weights & Measures:
Serves:
1
Preparation Time:
30 minutes

When learning how to make short crust pastry, you will find that the ingredients are basically the same for all recipes: flour (all-purpose flour, not cake flour), fat, a pinch of salt and a small amount of water. However, there are many people who don't know how to make short crust pastry the correct way and have given up due to poor results. Nevertheless, there is nothing like a homemade crust.
The key to learning how to make short crust pastry that is delicious, light and flaky is to keep the ingredients at the ideal temperature throughout each step, use the right tools, and use a light touch. A pastry cutter will help you achieve all of these goals. However, a standard table knife can be substituted if you don't have a pastry cutter on hand.
Step 1: Prepare the ingredients
Begin by cutting refrigerated butter into small pieces. If your recipe calls for half butter and half shortening, measure the shortening. Sift the all-purpose flour and a dash of salt into a bowl. Sifting adds air to the flour, helping to result in a lighter, flakier crust.
Step 2: Mix the flour and butter
Cut the cold butter and shortening into the flour using the pastry cutter or knife. Work quickly, making short chopping motions with the tool of your choice. Continue cutting the butter into the flour until the mixture resembles small bread crumbs.
Step 3: Add some water
The next step is to add a bit of cold water. Start with 1 or 2 tablespoons, sprinkling it over the flour and water mixture. With the pastry cutter or knife, continue to cut into the mixture.
Step 4: Keeping it cool
Now switch to mixing with your hands. However, the heat from your hands can warm the dough, resulting in a poor quality crust. Therefore, you should rinse your hands in cold water and lightly towel dry prior to handling the dough. Mix the dough quickly and thoroughly using only your finger tips, adding a little additional water if necessary, until the dough forms a ball. Don't over-mix!
Step 5: Give it a rest
Once mixed, it's important to allow the dough to rest before rolling. However, it is equally important to keep the dough cool. Wrapping the dough in plastic wrap and placing in the refrigerator for at least one half hour will accomplish both goals. You can leave the dough in the refrigerator for up to three days before baking.
Step 6: Rolling the dough
To make rolling easy, remove the dough from the refrigerator and allow it to stand at room temperature for about half an hour. Roll the dough to the desired size between two pieces of lightly floured waxed paper. This will not only keep the dough from sticking, but will also make it easy to transfer to a baking pan.
When learning how to make short crust dough that has both an excellent taste and a light flaky texture, the two main points to remember are temperature and technique. Keeping all ingredients cool and working with a swift yet light touch will yield excellent results every time.